---
id: 2025-05-12-install-immich-private-photo-cloud-on-ubuntu-24-04-lts-server
slug: install-immich-private-photo-cloud-on-ubuntu-24-04-lts-server
title: "Immich: install a private photo cloud on Ubuntu 24.04 LTS Server"
excerpt: "Install and run the self-hosted photo cloud Immich on Ubuntu 24.04 LTS with Docker Compose, PostgreSQL with pgvector, hardware transcoding and Nginx."
date: "2025-05-12T09:00:00+02:00"
updated: "2026-09-08T08:15:00+02:00"
author:
name: "Sebastian Palencsár"
handle: "spalencsar"
category: "server-environments"
tags: ["immich", "ubuntu", "ubuntu2404", "docker", "selfhosted", "linux", "server-environments"]
reading_time: 28
toc: true
---
[Immich](https://immich.app/){.badge-link-text} is a self-hosted platform for managing and backing up photos and videos, built as a standalone alternative to commercial cloud services such as [Google Photos](https://photos.google.com/){.badge-link-text} or [Apple iCloud](https://www.icloud.com/){.badge-link-text}. The software combines a responsive web interface with companion mobile apps for Android and iOS, automatic background upload, timeline navigation and album management.
Under the hood Immich is a different animal from traditional image galleries.
The platform relies on modern machine-learning pipelines for face recognition and semantic image search based on CLIP vector models, automatic transcoding of high-resolution video, and a strict split between application logic, caching and persistent metadata storage.
Immich goes onto an Ubuntu 24.04 LTS server in a production layout. Covered here are the system and storage architecture, container deployment through Docker Compose, hardware transcoding, hardening through an Nginx reverse proxy with TLS, plus automated database dumps and recovery strategies for when hardware actually fails.
💡 **Compatibility with Ubuntu 26.04 LTS:** Because Immich runs fully containerised through Docker Compose, every installation and configuration step here applies 1:1 on **Ubuntu 26.04 LTS** as well. If you want to upgrade an existing host, every step is in [Ubuntu upgrade: from version 24.04 LTS to 26.04 LTS](/en/server-environments/ubuntu-upgrade-from-24-04-lts-to-26-04-lts){.badge-link-text}.
## Architecture and components
Stable Immich operation needs a clear picture of the microservices involved. The overall system consists of four central containers that talk to each other over an isolated Docker network:
* **`immich-server`**: The core component accepts API requests from clients, serves the web interface, handles users and permissions, manages uploads and coordinates background jobs.
* **`immich-machine-learning`**: A specialised Python-based inference service. It computes high-dimensional vector embeddings (CLIP) for full-text image search, extracts facial features (facial recognition) and requires processor instructions such as AVX/AVX2 or dedicated GPU hardware.
* **`database` (PostgreSQL with vector extension)**: The relational database is not a stock PostgreSQL image, but a PostgreSQL instance equipped with `pgvector` or `vectorchord` (`ghcr.io/immich-app/postgres`). It stores image metadata, user profiles, EXIF attributes and vector indexes for similarity search.
* **`redis` / `valkey`**: An in-memory key-value store that acts as message broker and job queue. It buffers asynchronous tasks such as thumbnail generation, video transcoding and vector computation between the server and the background workers.
```markdown
┌─────────────────────────────────────────────────────────────┐
│ Immich container architecture and data flows │
├─────────────────────────────────────────────────────────────┤
│ │
│ Clients (mobile apps, web browsers) │
│ │ │
│ ▼ HTTPS (port 443 / TLS) │
│ ┌─────────────────────────────────────────────────────┐ │
│ │ Nginx reverse proxy (SSL, WebSocket, body limit) │ │
│ └──────────────────────────┬──────────────────────────┘ │
│ │ HTTP (port 2283) │
│ ▼ │
│ ┌─────────────────────────────────────────────────────┐ │
│ │ immich-server (REST API, web UI, job control) │ │
│ └───┬──────────────────────┬──────────────────────┬───┘ │
│ │ │ │ │
│ ▼ ▼ ▼ │
│ ┌─────────────┐ ┌─────────────┐ ┌───────────┐ │
│ │ database │ │ ML-Node │ │ redis │ │
│ │ (pgvector) │ │ (inference) │ │ (Queues) │ │
│ └──────┬──────┘ └──────┬──────┘ └─────┬─────┘ │
│ │ │ │ │
│ ▼ ▼ ▼ │
│ DB volume Model cache In-memory │
│ │
└─────────────────────────────────────────────────────────────┘
```
Splitting the work this way keeps compute-heavy processes such as ingesting tens of thousands of new photos from blocking the user interface.
## Hardware and system requirements
Compared with purely static galleries, Immich puts noticeable load on CPU, RAM and storage I/O. Automatic indexing of thousands of RAW files, videos and images produces substantial peaks.
### Sizing the core components
Plan hardware resources from library size and the number of concurrent users:
| Use case | CPU cores | Memory | Recommended storage |
| :--- | :--- | :--- | :--- |
| **Single user / test** | 2 cores (x86_64 with AVX) | 4 GB RAM | 60 GB SSD (system + DB) + media |
| **Family / production** | 4 cores (AVX2 support) | 8 GB to 16 GB RAM | 120 GB NVMe (DB) + HDD/ZFS pool |
| **Large collections (100k+)** | 6+ cores / iGPU (QuickSync) | 16 GB to 32 GB RAM | 250 GB NVMe (DB/cache) + bulk storage |
⚠️ **Critical CPU requirement:** The machine-learning container expects modern vector instruction-set extensions such as AVX or AVX2 for acceptable inference speed by default. On very old host CPUs or misconfigured VM hypervisors (for example the Proxmox default type `kvm64` instead of `host`) the ML container crashes when loading the models.
Check the CPU flags on your Ubuntu server in the terminal first:
```bash
grep -E 'avx|avx2' /proc/cpuinfo
```
If there is no output, the virtual or physical processor lacks the AVX extensions. In virtualised environments set the CPU model to `host` in the hypervisor settings.
### Storage architecture: split metadata and media
In production, keep storage paths cleanly separated:
* **PostgreSQL database and thumbnails:** Must sit on fast, local flash (NVMe or SATA SSDs). High I/O latency slows timeline scrolling drastically.
* **Media library (originals):** Can live on large disk arrays (RAID-ZFS, mdadm) or external mount points.
⚠️ **Never put the database on network shares:** The database volume (`DB_DATA_LOCATION`) must never be placed on NFS, CIFS or SMB shares. PostgreSQL needs strict POSIX file locking and synchronous write guarantees. Network filesystems reproducibly cause PostgreSQL deadlocks and irreparable database corruption.
## Deployment methods compared: Docker Compose vs. Snap
Two approaches exist for deploying Immich: the official Docker Compose deployment and unofficial community packages in Canonical's Snap format.
### Why Docker Compose is the standard
The Immich core team develops, tests and ships new versions primarily as Docker images. Docker Compose has concrete operational advantages:
* **Full control over hardware passthrough:** Intel QuickSync (`/dev/dri`) and Nvidia drivers for transcoding can be passed straight into the server container.
* **Free choice of storage paths:** Arbitrary host mounts and ZFS datasets can be attached without sandbox conflicts.
* **Deliberate version control:** Updates are triggered explicitly by the administrator instead of running uncontrolled in the background.
* **Direct database maintenance:** Administration and backup tools such as `pg_dumpall` can run directly through the container.
### The limits of Snap packages
The Snap Store has a community package (`immich-distribution`). A one-command install looks tempting, but Snap carries serious drawbacks in production:
* **Strict AppArmor confinement:** Snap isolates services in sandbox profiles. Attaching external disks or separate storage mounts needs manual interface grants (`removable-media`), which often fail on complex storage layouts.
* **Limited GPU use:** Access to host graphics cards for hardware transcoding is fragile through Snap.
* **Risk from automatic background updates:** Snap updates installed packages fully automatically four times a day by default. On complex microservice stacks with schema migrations in the database, an unprepared update can cause downtime.
For those reasons Docker Compose is the only reliable choice for lasting operation.
## System preparation and Docker installation
Start by preparing the Ubuntu 24.04 LTS server and installing the official Docker Engine including the Docker Compose plugin.
### Update the system and install base tools
Refresh the package sources and install the required helper tools:
```bash
sudo apt update && sudo apt upgrade -y
sudo apt install -y ca-certificates curl gnupg lsb-release
```
### Add the official Docker repository
Ubuntu's own repository often ships older Docker packages. Add Docker's official repository so current releases and security patches actually arrive:
```bash
sudo install -m 0755 -d /etc/apt/keyrings
curl -fsSL https://download.docker.com/linux/ubuntu/gpg | sudo gpg --dearmor -o /etc/apt/keyrings/docker.gpg
sudo chmod a+r /etc/apt/keyrings/docker.gpg
echo "deb [arch=$(dpkg --print-architecture) signed-by=/etc/apt/keyrings/docker.gpg] https://download.docker.com/linux/ubuntu $(. /etc/os-release && echo "$VERSION_CODENAME") stable" | sudo tee /etc/apt/sources.list.d/docker.list > /dev/null
```
Refresh the package lists again and install the Docker Engine plus the Compose plugin:
```bash
sudo apt update
sudo apt install -y docker-ce docker-ce-cli containerd.io docker-buildx-plugin docker-compose-plugin
```
After that, check the Docker service state:
```bash
sudo systemctl is-active docker
```
Output: `active`
To run Docker commands as a regular user without prefixing `sudo` every time, add your user to the `docker` system group:
```bash
sudo usermod -aG docker $USER
```
💡 **Activate group membership:** Log out of the SSH session once and log back in (or run `newgrp docker`) so the new group permission takes effect for your current shell.
## Docker Compose stack configuration
The Immich configuration lives in a dedicated directory. That makes later backups, updates and version control simpler.
### Project directory and source files
Create a working directory and download the official release files:
```bash
mkdir -p ~/immich
cd ~/immich
wget -O docker-compose.yml https://github.com/immich-app/immich/releases/latest/download/docker-compose.yml
wget -O .env https://github.com/immich-app/immich/releases/latest/download/example.env
```
### Adjust the `.env` configuration file
The `.env` file defines every variable parameter of the stack. Open it in an editor:
```bash
nano .env
```
Adjust the following key values to your system environment:
```ini
# Location for uploaded original photos and generated thumbnails
UPLOAD_LOCATION=/srv/immich/library
# Location for the PostgreSQL database (must sit locally on flash)
DB_DATA_LOCATION=/srv/immich/postgres
# System time zone
TZ=Europe/Berlin
# Pinned version or major-version branch
IMMICH_VERSION=v3
# Database password: alphanumeric characters only (A-Za-z0-9)
DB_PASSWORD=ASecureAlphanumericPassword42
# Database defaults (leave as-is in most cases)
DB_USERNAME=postgres
DB_DATABASE_NAME=immich
```
⚠️ **Avoid special characters in the database password:** In `DB_PASSWORD` use letters and digits only (`[A-Za-z0-9]`). Special characters such as `@`, `:`, `/` or quotation marks regularly cause parsing errors when the server container auto-generates database connection URIs.
### Create and lock down the storage directories
Create the directories defined in `.env` on the host and set matching ownership:
```bash
sudo mkdir -p /srv/immich/library /srv/immich/postgres
sudo chown -R $USER:$USER /srv/immich
```
### Structure of `docker-compose.yml`
The downloaded Compose file wires in all four microservices. It pulls environment variables from `.env` and sets the restart policy `restart: always` by default.
```yaml
name: immich
services:
immich-server:
container_name: immich_server
image: ghcr.io/immich-app/immich-server:${IMMICH_VERSION:-release}
volumes:
- ${UPLOAD_LOCATION}:/data
- /etc/localtime:/etc/localtime:ro
env_file:
- .env
ports:
- '2283:2283'
depends_on:
- redis
- database
restart: always
healthcheck:
disable: false
immich-machine-learning:
container_name: immich_machine_learning
image: ghcr.io/immich-app/immich-machine-learning:${IMMICH_VERSION:-release}
volumes:
- model-cache:/cache
env_file:
- .env
restart: always
healthcheck:
disable: false
redis:
container_name: immich_redis
image: docker.io/valkey/valkey:9@sha256:8e8d64b405ce18f41b8e5ee20aa4687a8ed0022d1298f2ce31cdcf3a76e09411
healthcheck:
test: redis-cli ping || exit 1
restart: always
database:
container_name: immich_postgres
image: ghcr.io/immich-app/postgres:14-vectorchord0.4.3-pgvectors0.2.0@sha256:bcf63357191b76a916ae5eb93464d65c07511da41e3bf7a8416db519b40b1c23
environment:
POSTGRES_PASSWORD: ${DB_PASSWORD}
POSTGRES_USER: ${DB_USERNAME}
POSTGRES_DB: ${DB_DATABASE_NAME}
POSTGRES_INITDB_ARGS: '--data-checksums'
volumes:
- ${DB_DATA_LOCATION}:/var/lib/postgresql/data
shm_size: 128mb
restart: always
healthcheck:
disable: false
volumes:
model-cache:
```
### Add hardware-accelerated transcoding (optional)
If the server has a modern Intel processor with an integrated GPU (QuickSync) or an AMD APU, you can accelerate video transcoding drastically and take load off the CPU.
Check whether the render device exists on the host:
```bash
ls -l /dev/dri
```
If `/dev/dri/renderD128` is listed, pass the directory into the `immich-server` container by adding the `devices` section in `docker-compose.yml`:
```yaml
immich-server:
container_name: immich_server
image: ghcr.io/immich-app/immich-server:${IMMICH_VERSION:-release}
devices:
- /dev/dri:/dev/dri
volumes:
- ${UPLOAD_LOCATION}:/data
- /etc/localtime:/etc/localtime:ro
env_file:
- .env
ports:
- '2283:2283'
depends_on:
- redis
- database
restart: always
```
FFmpeg inside the container then talks directly to VA-API or QuickSync hardware acceleration.
## Start the stack and verify operation
Change into `~/immich` and start the entire stack in the background:
```bash
docker compose up -d
```
Docker now pulls the container images, initialises the `immich_default` network and starts the four services in the correct dependency order.
### Check container status
After about 30 seconds, check the state of every container:
```bash
docker compose ps
```
Expected output:
```bash
NAME IMAGE COMMAND SERVICE CREATED STATUS PORTS
immich_machine_learning ghcr.io/immich-app/immich-machine-learning:v3 "./entrypoint.sh" immich-machine-learning 40 seconds ago Up 38 seconds (healthy)
immich_postgres ghcr.io/immich-app/postgres:... "docker-entrypoint.s…" database 40 seconds ago Up 38 seconds (healthy) 5432/tcp
immich_redis docker.io/valkey/valkey:9... "docker-entrypoint.s…" redis 40 seconds ago Up 39 seconds (healthy) 6379/tcp
immich_server ghcr.io/immich-app/immich-server:v3 "./start.sh" immich-server 40 seconds ago Up 38 seconds (healthy) 0.0.0.0:2283->2283/tcp
```
All four containers must show status `Up (healthy)` or `Up`.
### Inspect the logs
If a service fails to start, the container logs tell you immediately. Check initialisation of the server and the database:
```bash
docker compose logs --tail=50 immich-server
```
Look in the output for lines such as `[ImmichServer] Immich Server is listening on http://[::]:2283`. That signals that every database migration finished successfully.
💡 **No extra systemd wrapper needed:** The `restart: always` directive in `docker-compose.yml` makes the Docker Engine bring the containers back up after a server reboot. An extra systemd service for `docker compose up` is unnecessary and often causes race conditions when the host shuts down.
## Initial configuration through the web interface
Once the stack is running, open your server's IP address on port 2283 in a local web browser:
`http://192.168.1.100:2283` (replace the IP address with your host's).
### Create the administrator account
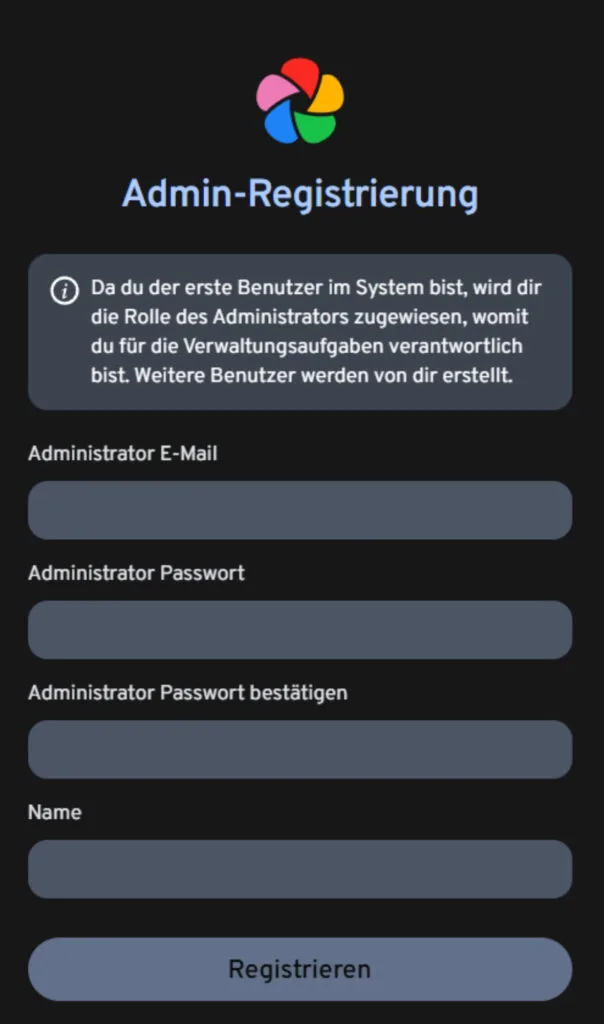
On first visit Immich presents the registration page for the primary account:
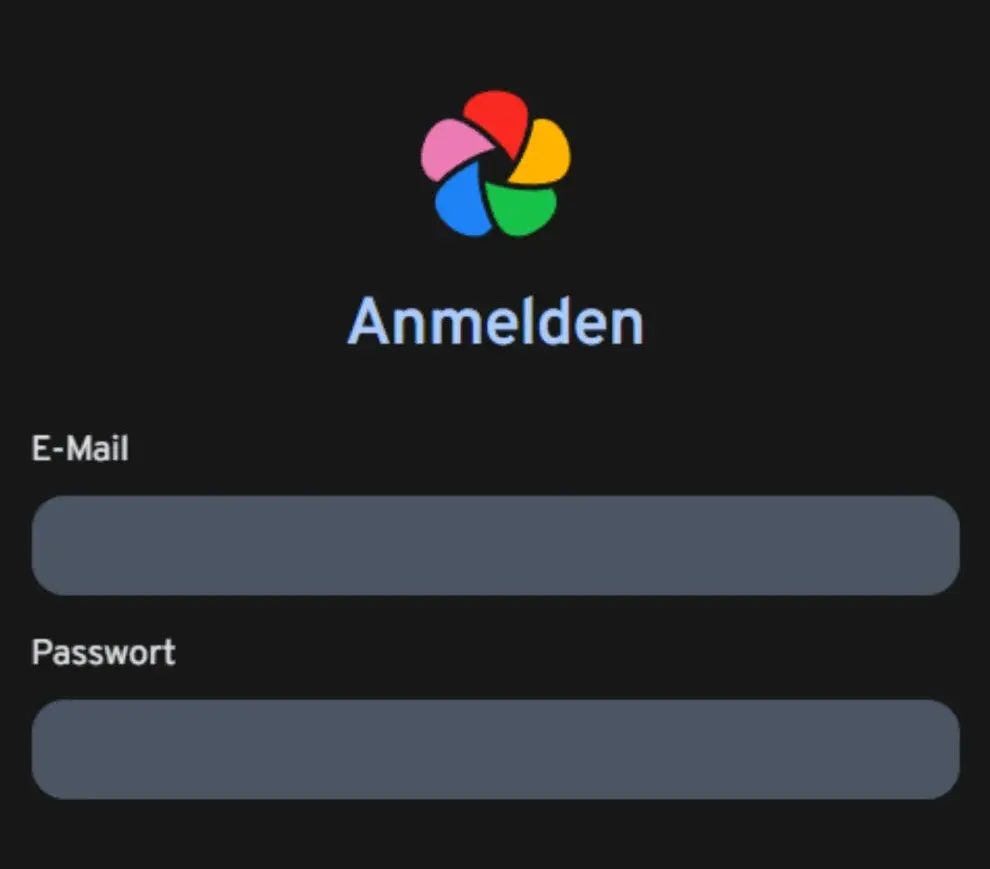
Enter a valid email address, your name and a long password. This account has full administrative rights on the server.
⚠️ **Use a dedicated admin account:** For security, keep the initial administrator account exclusively for system settings, backups and user management. Then create a regular user account without global administrative rights for your daily photo uploads.
After clicking **Create account**, sign in to the web interface:
### The quick-setup wizard
Immich then walks you through the base configuration:
* **Appearance:** Choose between a light and a dark theme.
* **Privacy and external services:** Here you decide whether Immich may load map tiles for the geo location view (`tiles.immich.cloud`) and regularly check for new software versions. For a fully air-gapped LAN deployment you can disable these options.
### Storage templates
By default Immich stores uploaded files under a cryptic asset ID. If you want files on the host filesystem in a clean, readable directory structure, enable the **storage template engine** under **Administration > Settings > Storage template**.
The engine works with dynamic placeholders based on EXIF metadata:
| Placeholder | Meaning | Example value |
| :--- | :--- | :--- |
| `{{y}}` | Creation year (four digits) | `2026` |
| `{{MM}}` | Month (two digits with leading zero) | `09` |
| `{{dd}}` | Day (two digits with leading zero) | `08` |
| `{{filename}}` | Original filename without path | `IMG_4021` |
| `{{filetype}}` | File extension or media type | `jpg` |
A production-tested pattern for the `Template` input field:
`{{y}}/{{y}}-{{MM}}-{{dd}}/{{filename}}`
That lays photos out on disk for example under `/srv/immich/library/admin/2026/2026-09-08/IMG_4021.jpg`.
💡 **Watch file-path lengths:** Linux filesystems typically cap path lengths at 4096 bytes and individual directory or file names at 255 characters. Keep storage templates compact and skip overly nested folder structures.
## Mobile app and synchronisation
The mobile apps for Android and iOS are the heart of Immich for automatic photo upload.
### Pairing and first-time setup
1. Install the official app from Google Play or the Apple App Store.
2. Enter the server address (for example your local LAN IP or the later HTTPS domain of the reverse proxy).
3. Sign in with your user credentials.
4. Select the device folders that should be synchronised (for example `DCIM/Camera`).
### Background-upload specifics
Modern mobile operating systems enforce strict power-saving:
* **iOS:** The system terminates background activity aggressively. In iOS settings under `Immich`, enable **Background App Refresh**, and during the first mass synchronisation of tens of thousands of photos leave the app open in the foreground overnight with the charging cable plugged in.
* **Android:** Exclude the Immich app from automatic battery optimisation in the Android battery settings (`Not optimized` or `Unrestricted`) so the kernel does not kill the upload service after a few minutes in the background.
### External libraries (read-only integration)
If you already have an existing photo collection on a NAS or a disk, you do not have to duplicate it. Immich supports attaching it as an **external library**.
Bind the source directory into `docker-compose.yml` under `volumes` read-only:
```yaml
volumes:
- ${UPLOAD_LOCATION}:/data
- /mnt/nas_photos:/data/external_photos:ro
- /etc/localtime:/etc/localtime:ro
```
After a restart (`docker compose up -d`), go in the web interface to **Administration > Libraries**, create a new external library and give the path `/data/external_photos`. Immich scans the metadata but leaves the original files untouched.
## Production hardening: Nginx reverse proxy with HTTPS
Exposing port `2283` unencrypted straight to the internet is grossly negligent. For secure remote access, put an Nginx web server in front as a reverse proxy that enforces TLS, buffers large file uploads and handles WebSocket connections for live updates.
### Install Nginx and Certbot
```bash
sudo apt install -y nginx certbot python3-certbot-nginx
```
### Configure the virtual host
Create a new configuration file for your Immich vhost:
```bash
sudo nano /etc/nginx/sites-available/immich.conf
```
Paste the following configuration. Replace `photos.your-domain.example` with your actual domain name:
```nginx
server {
listen 80;
server_name photos.your-domain.example;
# Maximum upload size for large 4K videos (50 GB)
client_max_body_size 50000M;
# Generous timeouts for slow upload connections
proxy_read_timeout 600s;
proxy_send_timeout 600s;
send_timeout 600s;
# Disable buffering so video uploads cannot overflow RAM
proxy_request_buffering off;
location / {
proxy_pass http://127.0.0.1:2283;
proxy_set_header Host $host;
proxy_set_header X-Real-IP $remote_addr;
proxy_set_header X-Forwarded-For $proxy_add_x_forwarded_for;
proxy_set_header X-Forwarded-Proto $scheme;
# WebSocket support for real-time status displays
proxy_http_version 1.1;
proxy_set_header Upgrade $http_upgrade;
proxy_set_header Connection "upgrade";
proxy_redirect off;
}
}
```
What the central directives do:
* **`client_max_body_size 50000M`**: By default Nginx rejects requests over 1 MB with `413 Request Entity Too Large`. The value 50000M allows uploads of video files up to 50 GB.
* **`proxy_request_buffering off`**: Stops Nginx from first writing incoming uploads completely to temporary files on the local system disk. Data is streamed straight through to the Immich container instead.
* **`Upgrade` and `Connection "upgrade"`**: Enables the HTTP upgrade connection for WebSockets. Without these headers, live notifications about processing status in the web interface fail.
Enable the configuration and check the syntax:
```bash
sudo ln -s /etc/nginx/sites-available/immich.conf /etc/nginx/sites-enabled/
sudo nginx -t
sudo systemctl reload nginx
```
### Obtain a TLS certificate with Let's Encrypt
Protect the domain through Certbot with a free TLS certificate:
```bash
sudo certbot --nginx -d photos.your-domain.example
```
Certbot modifies the configuration file automatically, enforces HTTPS and sets up renewal through a systemd timer.
### Firewall configuration with UFW
Restrict access to the server strictly. With a reverse proxy in place, port 2283 must no longer be reachable from the outside:
```bash
sudo ufw default deny incoming
sudo ufw default allow outgoing
sudo ufw allow ssh
sudo ufw allow 80/tcp
sudo ufw allow 443/tcp
sudo ufw enable
sudo ufw reload
```
## Backup and disaster-recovery strategy
A photo cloud is only worth as much as its recoverability after a hardware failure. Immich backups split into two mandatory parts:
1. **The relational database:** Holds albums, face data, user mappings, timeline mappings and vectors. Without this state the file structure is incomplete.
2. **The media library:** The directory with the actual image and video files.
```markdown
┌─────────────────────────────────────────────────────────────┐
│ Immich 3-2-1 backup and disaster recovery │
├─────────────────────────────────────────────────────────────┤
│ │
│ Component A: PostgreSQL Component B: media │
│ ┌───────────────────────┐ ┌───────────────────────┐ │
│ │ pg_dumpall (metadata) │ │ /data (originals/RAW) │ │
│ └───────────┬───────────┘ └───────────┬───────────┘ │
│ │ │ │
│ ▼ ▼ │
│ ┌─────────────────────────────────────────────────────┐ │
│ │ Local backup staging (daily SQL dumps/snap) │ │
│ └──────────────────────────┬──────────────────────────┘ │
│ │ │
│ ▼ Encrypted synchronisation │
│ ┌─────────────────────────────────────────────────────┐ │
│ │ Off-site storage (NAS via ZFS / S3 object store) │ │
│ └─────────────────────────────────────────────────────┘ │
│ │
└─────────────────────────────────────────────────────────────┘
```
### Database backup from the CLI
Immich does expose an internal dump mechanism in the web interface under **Administration > Settings > Backup**, but at operating-system level you should still back that with an automated script.
The most reliable path for a complete PostgreSQL dump while the system is running:
```bash
docker exec -t immich_postgres pg_dumpall --clean --if-exists --username=postgres | gzip > /srv/backups/immich_db_$(date +%Y%m%d_%H%M%S).sql.gz
```
💡 **Consistent dump state:** For maximum consistency before large version upgrades you can briefly stop the server container (`docker compose stop immich-server`), run the database dump, then start the server again (`docker compose start immich-server`).
### Backing up the media library
Protect the media directory `/srv/immich/library` with tools such as `rsync`, Restic or BorgBackup onto a separate storage system:
```bash
rsync -aAXv --delete /srv/immich/library/ /mnt/backup_storage/immich_library/
```
Apply the established **3-2-1 rule**:
* **3** copies of the data (production system, local backup, external archive)
* **2** different storage media (for example NVMe SSD in the server, ZFS pool on the backup NAS)
* **1** copy at a geographically separate site (for example encrypted cloud storage)
### Disaster recovery: the restore scenario
On a total failure, or when you move to a new server, follow this sequence:
1. Set up the new server with Ubuntu 24.04 and Docker.
2. Sync the backed-up media library to its original path `/srv/immich/library`.
3. Place `docker-compose.yml` and `.env` in the project folder.
4. Start only the database container:
```bash
docker compose up -d database
```
5. Load the database dump into the newly initialised PostgreSQL instance:
```bash
gunzip -c /srv/backups/immich_db_backup.sql.gz | docker exec -i immich_postgres psql -U postgres -d immich
```
6. Start the remaining stack:
```bash
docker compose up -d
```
7. Check the logs: the Immich server recognises the restored metadata and attaches the existing media seamlessly.
## Maintenance, updates and operational monitoring
Immich is under continuous development. Structured procedure on version upgrades is mandatory if you want to avoid incompatibilities.
### Upgrade discipline
Before every version jump, read the official release notes on GitHub. Larger version transitions (for example from v1.x to v2.x or v2.x to v3.x) occasionally include preparatory migration steps.
Run the update with the following command chain:
```bash
cd ~/immich
# 1. Take a safety dump of the database
docker exec -t immich_postgres pg_dumpall --clean --if-exists --username=postgres | gzip > ~/immich_pre_upgrade.sql.gz
# 2. Pull new container images
docker compose pull
# 3. Restart the stack with the new images
docker compose down
docker compose up -d
# 4. Watch the database migration in the log
docker compose logs -f immich-server
```
### Deliberate version pinning
Instead of always using the floating tag `:release` or `:v3`, you can pin a concrete release version in the `.env` file:
```ini
IMMICH_VERSION=v3.0.1
```
That stops an accidental `docker compose pull` from putting untested changes onto production.
### Maintenance jobs in the web interface
Under **Administration > Jobs** Immich provides automated maintenance workflows:
* **Detect faces / rescan:** Useful after machine-learning container updates, so improved recognition models are applied to existing faces.
* **Generate thumbnails:** Repairs missing previews when cache volumes are broken.
* **Scan library:** Finds image files placed or moved manually in the storage folder.
## Troubleshooting
When services misbehave or uploads abort, narrow the fault down systematically against the system components.
### Web interface does not respond (502 Bad Gateway)
If Nginx answers with `502 Bad Gateway`, the upstream service `immich-server` is not running or is not listening on port 2283.
**Diagnosis:**
```bash
docker compose ps
docker compose logs --tail=100 immich-server
```
**Possible causes:**
* **Database connection failed:** Check that the `immich_postgres` container is healthy and that the password in `.env` matches the database initial values exactly.
* **Port conflict on the host:** Check with `ss -tulpn | grep 2283` whether another process occupies port 2283.
### Uploads abort with HTTP 413 or 504
If the error is `413 Request Entity Too Large`, the Nginx reverse proxy is blocking the request because `client_max_body_size` is set too low.
If very large videos hit a `504 Gateway Timeout`, the `proxy_read_timeout` or `proxy_send_timeout` directives in Nginx have fired.
**Fix:**
Make sure the Nginx vhost configuration has `client_max_body_size 50000M;` and timeouts of at least `600s`, then reload Nginx:
```bash
sudo nginx -t && sudo systemctl reload nginx
```
### Machine-learning container crashes on start
If the `immich_machine_learning` container crashes after start, the usual causes are missing CPU instruction sets or insufficient RAM.
**Diagnosis:**
```bash
docker compose logs immich-machine-learning
```
If the log shows `Illegal instruction (core dumped)`, your CPU does not support AVX instructions.
**Remedy:**
* In virtual environments (KVM / Proxmox) set the CPU type to `host`.
* On systems without physical AVX support, the Compose configuration needs an alternative machine-learning model that falls back to standard floating-point operations only.
### Broken file permissions
If uploads fail with `EACCES: permission denied`, the container lacks write rights on the host directory `/srv/immich/library`.
**Fix:**
```bash
sudo chown -R 1000:1000 /srv/immich/library
sudo chmod -R 750 /srv/immich/library
```
## Command Reference (Cheatsheet)
The most important commands for daily Immich administration and maintenance:
| Command | Purpose | Context |
| :--- | :--- | :--- |
| `docker compose up -d` | Start the entire stack in the background | Project folder `~/immich` |
| `docker compose down` | Stop and remove all containers in a controlled way | Project folder `~/immich` |
| `docker compose ps` | Show status and healthchecks of every service | Diagnostics |
| `docker compose logs -f --tail=50 immich-server` | Follow live logs of the application server | Fault analysis |
| `docker compose logs -f database` | Check live logs of the PostgreSQL database | Fault analysis |
| `docker compose restart immich-server` | Restart the application server in isolation | Configuration change |
| `docker exec -t immich_postgres pg_dumpall --clean --if-exists -U postgres \| gzip > backup.sql.gz` | Create a complete SQL database dump | Backup |
| `gunzip -c backup.sql.gz \| docker exec -i immich_postgres psql -U postgres -d immich` | Restore an SQL dump into the database | Disaster recovery |
| `docker compose pull && docker compose up -d` | Pull new container images and update | Update workflow |
| `docker system prune -f` | Clean unused old container images | Disk maintenance |
## Further Resources
Central documentation, source repositories and interfaces for running Immich:
| Resource | Description | Type |
| :--- | :--- | :--- |
| [Official Immich documentation](https://docs.immich.app/){.badge-link-text} | Reference for configuration parameters and environment variables | Documentation |
| [Immich GitHub repository](https://github.com/immich-app/immich){.badge-link-text} | Source code, bug tracker, discussions and release notes | Source code |
| [Hardware transcoding guide](https://docs.immich.app/features/hardware-transcoding){.badge-link-text} | Official configuration for Intel QuickSync, VA-API and Nvidia NVENC | Configuration |
| [Immich backup and restore guide](https://docs.immich.app/administration/backup-and-restore){.badge-link-text} | Best practices for consistent database and file backups | Documentation |
| [Docker Engine documentation](https://docs.docker.com/engine/){.badge-link-text} | Official handbook for administering containers on Linux | Reference |
## Conclusion
This deployment gives you a full private photo and video cloud under your own control on Ubuntu 24.04 LTS Server. Splitting the work across specialised microservices for server logic, vector database, in-memory queues and machine-learning inference keeps performance and scalability high even with large media collections.
Nginx as a hardened reverse proxy, tuned upload and WebSocket buffers, hardware-accelerated transcoding and automated PostgreSQL dumps put the setup on a stable production foundation.
💡 **Practical tip for production:** Keep Immich version upgrades tightly scheduled. Because the project moves quickly, small, regular version jumps with a prior database dump are operationally far less risky than one giant upgrade after twelve months.